Brewing Beyond the Basics: Mastering Advanced Coffee Techniques

brewing beyond
Welcome to the exciting world of coffee, where possibilities are as limitless as your imagination. If you’re a coffee enthusiast ready to take your brewing skills to new heights, join us as we venture beyond the basics and dive headfirst into the realm of advanced coffee techniques. Get ready to unlock the secrets to making coffee that’s not just a beverage but a masterpiece.
The Allure of Advanced Coffee Techniques
Before we embark on our journey to master advanced coffee techniques, let’s take a moment to understand the allure of going beyond the basics. Coffee is more than a morning pick-me-up; it’s a canvas for creativity, a medium for expression, and a delightful exploration of flavors, aromas, and brewing methods.
Advanced techniques open up a world of possibilities, allowing you to craft coffee experiences that are uniquely yours. Whether you’re intrigued by the precision of pour-over, the science of espresso extraction, or the artistry of latte art, mastering these techniques elevates your coffee game and brings you closer to the coffee craft.
The Journey Begins: Mastering the Pour-Over
Our journey into advanced coffee techniques starts with the elegant and precise pour-over method. Often considered the epitome of manual brewing, pour-over allows you to control every aspect of the brewing process, from water temperature to pouring technique. Here’s a simplified overview of the steps involved:
1. Equipment: To embark on your pour-over journey, you’ll need a pour-over dripper (such as a V60 or Chemex), quality coffee beans Dubai, a gooseneck kettle, a scale, and a timer. .
2. Coffee-to-Water Ratio: Dial in your coffee-to-water ratio, typically around 1:16 to 1:17 (1 gram of coffee to 16-17 grams of water).
3. Grind Size: Adjust your grind size to match the brewing time and method. For pour-over, a medium-coarse grind works well.
4. Bloom: Start by pouring a small amount of hot water over the coffee grounds to saturate them evenly. This is known as the bloom, where gases are released and the coffee “blooms” like a flower.
5. Controlled Pour: Gradually pour hot water in a spiral motion, starting from the center and moving outward. Maintain a consistent flow rate to ensure even extraction.
6. Brew Time: Depending on your recipe and grind size, your brew time may vary. Aim for a total brew time of 2-4 minutes.
7. Enjoy: Savor your meticulously brewed pour-over coffee. Each sip is a testament to your skill and precision.
The Art and Science of Espresso

Next, we journey into the heart of espresso – the art and science of concentrated coffee extraction. Espresso is the cornerstone of many beloved coffee beverages, from lattes to Americanos. Here’s a glimpse into the world of advanced espresso techniques:
1. Espresso Machine: To embark on your espresso adventure, you’ll need an espresso machine equipped with a good quality grinder, a tamper, and a shot glass or scale for measuring.
2. Coffee Selection: Choose a high-quality espresso roast, often characterized by its balanced flavor profile and medium roast level.
3. Dosing and Tamping: Measure and dose your coffee precisely, usually around 18-20 grams for a double shot. Tamp the grounds evenly and firmly to create a uniform puck.
4. Extraction Time: Aim for a 25-30 second extraction time, during which hot water passes through the coffee grounds, extracting the flavors and aromas.
5. Pressure and Temperature: Understand the importance of pressure (typically 9 bars) and water temperature (around 200°F or 93°C) in the extraction process.
6. Texture and Crema: Observe the texture of the espresso as it flows into the cup. Ideally, it should have a rich, syrupy consistency and a layer of crema on top.
7. Dialing In: Master the art of “dialing in” your espresso, adjusting grind size, dose, and extraction time to achieve the perfect shot.
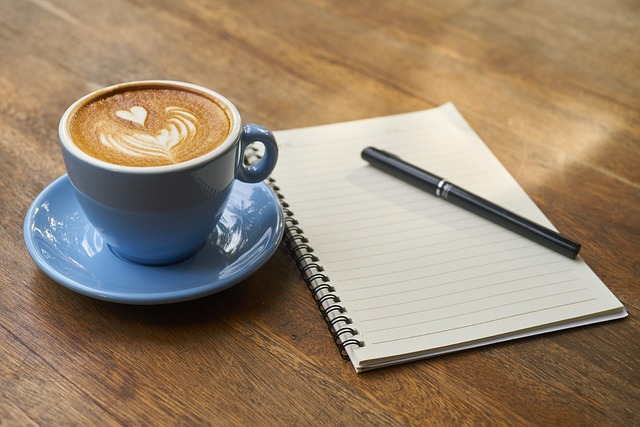
The Artistry of Latte Art
Our journey wouldn’t be complete without exploring the artistry of latte art. Latte art takes coffee to a whole new level, turning your cup into a canvas. Creating intricate designs requires skill, practice, and a steady hand. Here’s a simplified guide to get you started:
1. Prepare Espresso: Begin by pulling a shot of espresso. Ensure it’s well-extracted and has a nice layer of crema.
2. Steam Milk: Steam and froth milk to the desired temperature, usually around 150°F (65°C). Proper milk texture is crucial for creating latte art.
3. Pouring Technique: Hold a steady hand as you pour the frothed milk into the espresso. Start by pouring from a height to create a base canvas.
4. Design Creation: Use controlled movements to create designs like hearts, rosettes, or tulips. Practice different pouring techniques and patterns to achieve various latte art designs.
5. Enjoy and Share: Admire your latte art creation, snap a photo (if you wish), and savor your beautifully crafted coffee.
Conclusion: Elevate Your Coffee Craft
As we conclude our journey into advanced coffee techniques, remember that mastery comes with practice, experimentation, and a genuine love for coffee. These techniques are your tools for crafting coffee experiences that are not only delicious but also visually stunning.
This Guest Blog was written by Ten Coffees, so now embrace the precision of pour-over, the science of espresso, and the artistry of latte art. Explore new flavors, experiment with different beans and brewing methods, and share your creations with fellow coffee enthusiasts. Your coffee journey is a canvas waiting to be filled with your unique masterpiece. So, elevate your coffee craft, savor each sip, and let your passion for coffee shine through in every cup you brew. Cheers to the exciting world of advanced coffee techniques!
Read more: What Does Your Coffee Say About You?


